整合应用测试
上一小节已经完成了SSM框架整合环境的搭建工作,可以说完成了这些配置后,就已经完成了这三个框架大部分的整合工作。接下来,同样以查询客户信息为例,来讲解下SSM框架的整合开发,其具体实现步骤如下。
(1)在src目录下,创建一个com.itheima.po包,并在包中创建持久化类Customer,编辑后如文件1所示。
文件1 Customer.java
 1    package com.itheima.po;
 2    /**
 3     * 客户持久化类
 4     */
 5    public class Customer {
 6            private Integer id;       // 主键id
 7        private String username; // 客户名称
 8        private String jobs;      // 职业
 9        private String phone;     // 电话
 10        public Integer getId() {
 11            return id;
 12        }
 13        public void setId(Integer id) {
 14            this.id = id;
 15        }
 16        public String getUsername() {
 17            return username;
 18        }
 19        public void setUsername(String username) {
 20            this.username = username;
 21        }
 22        public String getJobs() {
 23            return jobs;
 24        }
 25        public void setJobs(String jobs) {
 26            this.jobs = jobs;
 27        }
 28        public String getPhone() {
 29            return phone;
 30        }
 31        public void setPhone(String phone) {
 32            this.phone = phone;
 33        }
 34    }
在文件1中,编写了一个用于映射数据库表t_customer的客户持久化类,在类中分别定义了id、username、jobs、和phone属性,以及其对应的getter/setter方法。
(2)在src目录下,创建一个com.itheima.dao包,并在包中创建接口文件CustomerDao以及对应的映射文件CustomerDao.xml,编辑后分别如文件2和文件3所示。
文件2 CustomerDao.java
 1    package com.itheima.dao;
 2    import com.itheima.po.Customer;
 3    /**
 4     * Customer接口文件
 5     */
 6    public interface CustomerDao {
 7        /**
 8         * 根据id查询客户信息
 9         */
 10        public Customer findCustomerById(Integer id);
 11    }
从上述代码可以看出,CustomerDao中只定义了一个根据id查询客户信息的方法。
文件3 CustomerDao.xml
 1    <?xml version="1.0" encoding="UTF-8"?>
 2    <!DOCTYPE mapper PUBLIC "-//mybatis.org//DTD Mapper 3.0//EN"
 3        "http://mybatis.org/dtd/mybatis-3-mapper.dtd">
 4    <mapper namespace="com.itheima.dao.CustomerDao">
 5        <!--根据id查询客户信息 -->
 6        <select id="findCustomerById" parameterType="Integer"
 7                                           resultType="Customer">
 8            select * from t_customer where id = #{id}
 9        </select>
 10    </mapper>
在文件3中,根据文件2中接口文件的方法编写了对应的执行语句信息。
小提示:
在前面小节整合环境搭建时,已经在配置文件applicationContext.xml中使用包扫描的形式加入了扫描包com.itheima.dao下的所有接口及映射文件,所以在这里完成DAO层接口及映射文件开发后,就不必再进行映射文件的扫描配置了。
(3)在src目录下,创建一个com.itheima.service包,然后在包中创建接口文件CustomerService,并在CustomerService中定义通过id查询客户的方法,如文件4所示。
文件4 CustomerService.java
 1    package com.itheima.service;
 2    import com.itheima.po.Customer;
 3    public interface CustomerService {
 4        public Customer findCustomerById(Integer id);
 5    }
(4)在src目录下,创建一个com.itheima.service.impl包,并在包中创建CustomerService接口的实现类CustomerServiceImpl,编辑后如文件5所示。
文件5 CustomerServiceImpl.java
 1    package com.itheima.service.impl;
 2    import org.springframework.beans.factory.annotation.Autowired;
 3    import org.springframework.stereotype.Service;
 4    import org.springframework.transaction.annotation.Transactional;
 5    import com.itheima.dao.CustomerDao;
 6    import com.itheima.po.Customer;
 7    import com.itheima.service.CustomerService;
 8    @Service
 9    @Transactional
 10    public class CustomerServiceImpl implements CustomerService {
 11        //注解注入CustomerDao
 12        @Autowired
 13        private CustomerDao customerDao;
 14        //查询客户
 15        public Customer findCustomerById(Integer id) {
 16            return this.customerDao.findCustomerById(id);
 17        }
 18    }
在文件5中,使用了@Service注解来标识业务层的实现类,使用了@Transactional注解来标识类中的所有方法都纳入Spring的事务管理,并使用@Autowired注解将CustomerDao接口对象注入到本类中,然后在本类的查询方法中调用了CustomerDao对象的查询客户方法。
小提示:
在上述代码中,@Transactional注解主要是针对数据的增加、修改、删除进行事务管理,上示例中的查询方法并不需要使用该注解,此处的作用就是告知读者该注解在实际开发中应该如何使用。
(5)在src目录下,创建一个com.itheima.controller包,并在包中创建用于处理页面请求的控制类CustomerController,编辑后如文件6所示。
文件6 CustomerController.java
 1    package com.itheima.controller;
 2    import org.springframework.beans.factory.annotation.Autowired;
 3    import org.springframework.stereotype.Controller;
 4    import org.springframework.ui.Model;
 5    import org.springframework.web.bind.annotation.RequestMapping;
 6    import com.itheima.po.Customer;
 7    import com.itheima.service.CustomerService;
 8    @Controller
 9    public class CustomerController {
 10        @Autowired
 11        private CustomerService customerService;
 12        /**
 13         * 根据id查询客户详情
 14         */
 15        @RequestMapping("/findCustomerById")
 16        public String findCustomerById(Integer id,Model model) {
 17            Customer customer = customerService.findCustomerById(id);
 18            model.addAttribute("customer", customer);
 19            //返回客户信息展示页面
 20            return "customer";
 21        }
 22    }
在文件6中,先使用了Spring的注解@Controller来标识控制器类,然后通过@ Autowired注解将CustomerService接口对象注入到本类中,最后编写了一个根据id查询客户详情的方法findCustomerById(),该方法会将获取的客户详情返回到视图名为customer的jsp页面中。
(6)在WEB-INF目录下,创建一个jsp文件夹,在该文件夹下创建一个用于展示客户详情的页面文件customer.jsp,编辑后如文件7所示。
文件7 customer.jsp
 1    <%@ page language="java" contentType="text/html; charset=UTF-8"
 2        pageEncoding="UTF-8"%>
 3    <!DOCTYPE html PUBLIC "-//W3C//DTD HTML 4.01 Transitional//EN"
 4        "http://www.w3.org/TR/html4/loose.dtd">
 5    <html>
 6    <head>
 7    <meta http-equiv="Content-Type" content="text/html; charset=UTF-8">
 8    <title>客户信息</title>
 9    </head>
 10    <body>
 11        <table border=1>
 12            <tr>
 13                <td>编号</td>
 14                <td>名称</td>
 15                <td>职业</td>
 16                <td>电话</td>
 17            </tr>
 18            <tr>
 19                <td>${customer.id}</td>
 20                <td>${customer.username}</td>
 21                <td>${customer.jobs}</td>
 22                <td>${customer.phone}</td>
 23            </tr>
 24        </table>
 25    </body>
 26    </html>
在文件7中,编写了一个用于展示客户信息的表格,表格会通过EL表达式来获取后台控制层返回的客户信息。
(7)将项目发布到Tomcat服务器并启动,在浏览器中访问地址http://localhost:8080/chapter17**/**findCustomerById?id=1,其显示效果如图1所示。
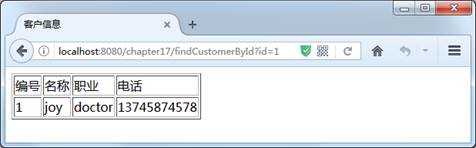
图1 查询结果
从图1可以看出,通过浏览器已经成功查询出了t_customer表中id为1的客户信息,这也就说明SSM框架整合成功。

隐藏目录